

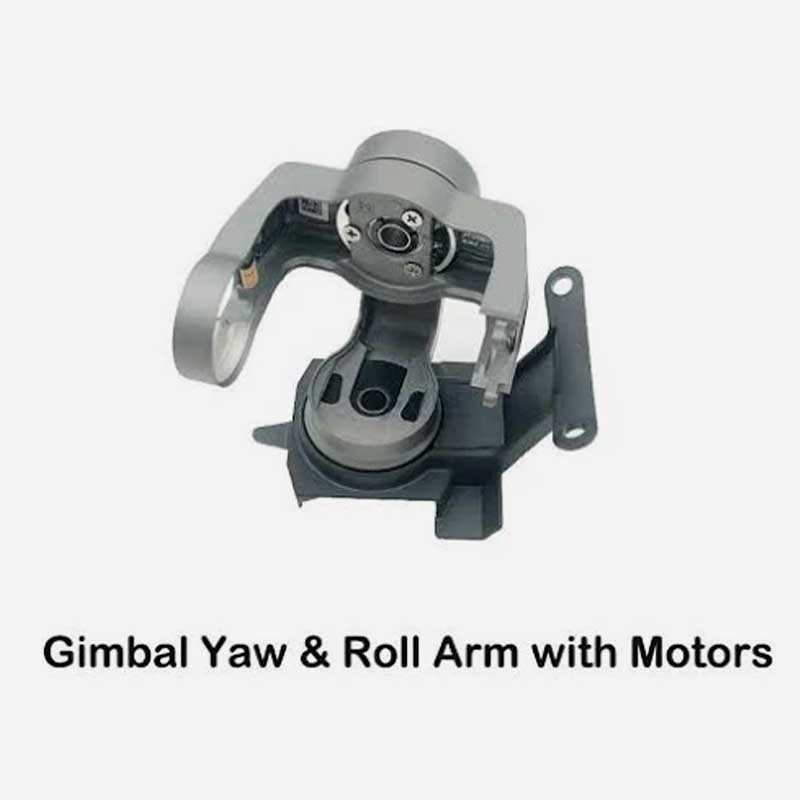


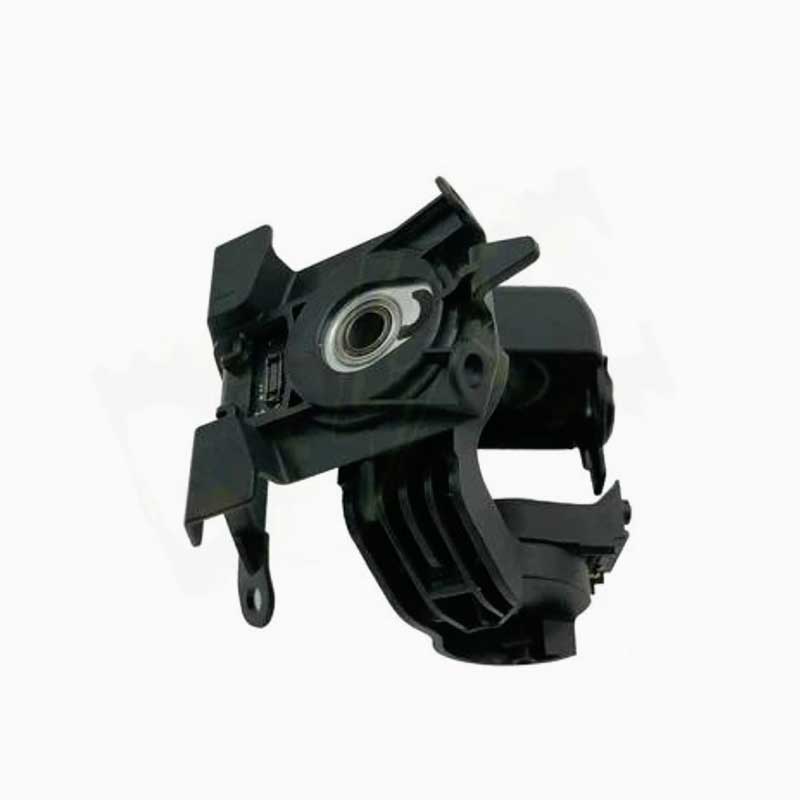
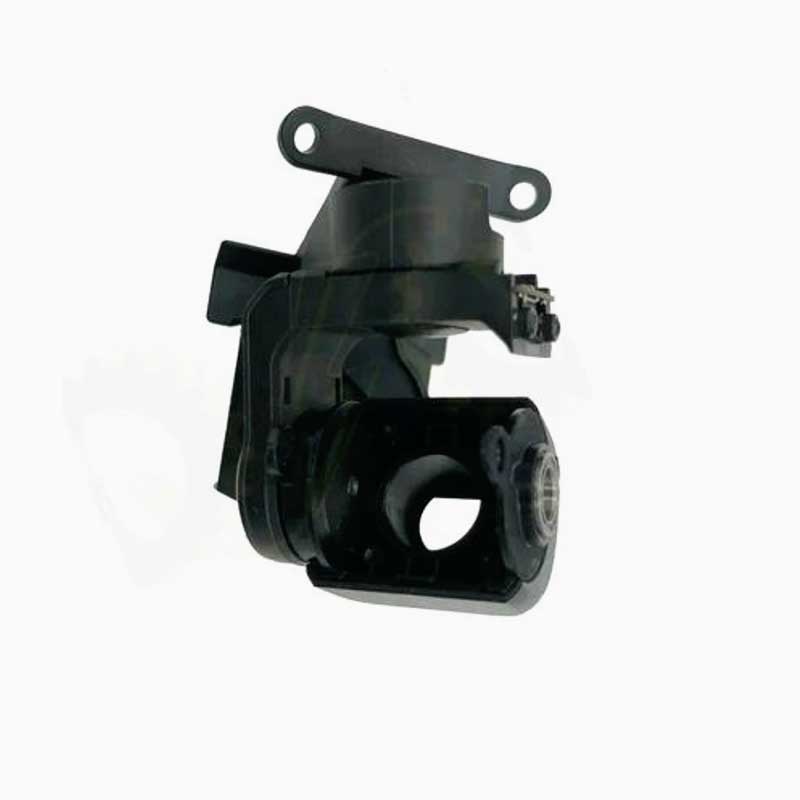
DJI Air 2S Yaw Arm Motor
₹13,999.00 Original price was: ₹13,999.00.₹11,799.00Current price is: ₹11,799.00. incl. Gst
- Product Name: DJI Air 2S Yaw Arm with Motor
- Compatibility: DJI Air 2S Drone
- Axis Type: Yaw Axis
- Function: Gimbal stabilization component
- Condition: New or used (tested)
- Material: Lightweight alloy
- Installation: Requires technical skill
- Color: Silver
- Weight: Approx. 10g
- Package Includes: 1 x Yaw Arm with Motor
Need Help? Chat with an Expert
- 9891098328
Free Shipping & Returns
Assured Quality
Online Support 24/7
Secure Payment
- Description
- Specification
- Reviews (0)
Description
DJI Air 2S Yaw Arm Motor – The Hidden Power Behind Every Perfect Turn
Your DJI Air 2S may look like it’s gliding through the sky with cinematic grace, but behind every smooth pan and stable rotation is a hardworking hero—the yaw arm motor. This little component controls your drone’s side-to-side camera movement and is responsible for those dramatic cinematic turns that make your footage look straight out of a Bollywood aerial shot. If your camera’s turning feels stiff, shaky, or just plain off, chances are this motor needs a vacation—or a replacement. The DJI Air 2S Yaw Arm Motor is here to bring that smooth yaw movement back, quietly working behind the scenes to ensure every flight is film-ready.
Key Features Of DJI Air 2s Yaw Arm Motor
1. Perfectly Tailored for DJI Air 2S
No shortcuts here—this yaw motor isn’t recycled from another drone or picked out of a universal parts bin. It’s built specifically for the DJI Air 2S, designed to fit seamlessly into the yaw axis assembly of the gimbal. That means it matches the size, weight, connection ports, and performance profile of the original part, giving your drone a second chance to perform just like it did out of the box. You won’t need to juggle adapters or force-fit anything—it just works.
2. Restores Smooth Yaw Movement
Yaw axis giving weird wobbles mid-flight? Can’t get that sweeping left-right pan without jittering like a scared cat? This motor is the fix. By replacing the damaged or malfunctioning yaw motor, you’re restoring fluid rotational movement to your gimbal. That means no more jerky footage, no more software compensation, and no more post-edit headaches. Just clean, cinematic turns that follow your subject with buttery smoothness.
3. Silent but Strong Performer
Don’t be fooled by the size—this tiny motor works harder than your office AC during peak summer. It delivers consistent torque to rotate your gimbal while keeping noise and vibration levels so low, you’ll forget it’s even there. It handles constant directional changes mid-flight like a pro, without stalling, overheating, or throwing a tantrum. Whether you’re doing slow tracking shots or fast motion pans, this motor stays calm and reliable.
4. Lightweight Design, Heavy-Duty Output
The yaw arm motor is designed with lightweight coils and compact housing to maintain your drone’s overall balance and flight time. Despite its small frame, it packs enough power to smoothly control the gimbal without overloading the system or drawing too much battery. So you get pro-level stability without sacrificing airtime or responsiveness. It’s like having a gym-trained ballerina in your drone—strong, light, and graceful.
5. DIY-Friendly Installation
With the right tools and a little patience, even a first-timer can manage the installation. The motor comes with standard mounts and connectors, so there’s no guesswork. Just open the gimbal assembly, replace the motor in its original slot, connect the flex cables, and screw it all back. Calibration is key afterward, but once done, your gimbal is back to gliding like a dream. And if you’re nervous? Any decent repair tech can handle this with their eyes closed.
How to Use
-
Power off and disconnect the drone battery to avoid any accidental short circuits before beginning the motor replacement.
-
Carefully open the gimbal assembly using precision screwdrivers and anti-static tools. Identify the yaw axis component.
-
Unplug and remove the old motor by disconnecting the flex cable and unscrewing its mount from the yaw axis arm.
-
Install the new yaw arm motor by aligning it exactly as the old one was placed, securing it tightly, and reconnecting all cables correctly.
-
Perform gimbal calibration through the DJI Fly app to reconfigure your drone and ensure the new motor is fully synced and functional.
How to Clean
-
Use a soft, dry brush to gently dust off the exterior housing of the motor. Avoid pushing particles deeper into crevices.
-
For sticky spots, use a microfiber cloth dampened with 90% isopropyl alcohol. Wipe gently and avoid scrubbing hard.
-
Never use water-based cleaners as motors are sensitive to moisture, and internal corrosion can cause long-term damage.
-
Inspect the area around the motor regularly, especially after outdoor flights. Remove any sand or debris stuck in the axis joints.
-
Avoid using compressed air at high pressure, which may force debris into the motor windings or damage the connectors.
How to Take Care
-
Always store your drone in a padded case, especially when traveling. Sudden knocks can throw off the gimbal balance or misalign the yaw motor.
-
Avoid harsh takeoffs and landings, as shocks can weaken or loosen motor mounts, reducing performance over time.
-
Do not manually force the gimbal when powered off. Let the motors do the moving—they don’t like being dragged around.
-
Update firmware regularly, so the flight controller communicates properly with the new motor and ensures optimal response.
-
Perform routine inspections every 10–15 flights to ensure the yaw motor is operating smoothly and without physical resistance.
Dos & Don’ts
Do’s:
-
Use the correct tools when opening the gimbal assembly to avoid damaging screws or slipping on small parts.
-
Label connectors and screws during disassembly to make reassembly smoother and error-free.
-
Calibrate the gimbal immediately after motor replacement. This step is crucial for restoring full function and balance.
-
Use original or OEM-grade motors to avoid compatibility or power issues that could affect drone safety and performance.
-
Perform test flights in open areas after replacement to monitor the gimbal’s behavior and responsiveness.
Don’ts:
-
Don’t touch exposed flex cables with oily hands—this can damage connectors or lead to signal errors between the motor and controller.
-
Avoid using non-DJI parts that claim to be “universal”—they can cause more harm than good to your delicate gimbal system.
-
Don’t ignore small vibrations or delays in panning, as they may be early signs of motor strain or imbalance.
-
Never skip post-installation testing, even if the drone powers on fine. Gimbal calibration is what makes everything work properly.
-
Don’t fly immediately in windy conditions after replacement. Do a few calm test runs to ensure everything is steady and balanced.
Safety Tips
-
Wear an anti-static wristband while handling internal gimbal parts to protect sensitive electronics from discharge damage.
-
Keep small screws organized and avoid using magnetic tools near the gimbal motors as they can interfere with sensor readings.
-
Power down the drone completely before touching any internal parts. A live gimbal can rotate suddenly and cause injury.
-
Always test manually first by rotating the gimbal gently before powering on, to check for friction or misalignment.
-
Get professional help if unsure, especially if the gimbal was already damaged. Don’t risk worsening the issue with a wrong repair.
Final Words
The DJI Air 2S Yaw Arm Motor might look small, but it’s the muscle behind your drone’s smooth panning and perfect camera control. If your drone has been struggling to make clean turns or feels like it’s resisting movement, this is your solution. With OEM-grade quality, lightweight design, and easy installation, it’s the best way to bring your gimbal performance back to life. Don’t settle for jittery footage or faulty motors—upgrade to the genuine yaw arm motor and fly with confidence, stability, and cinematic grace.
Specifications Of DJI Air 2S Yaw Arm with Motor
| Specification | Details |
|---|---|
| Product Name | DJI Air 2S Yaw Arm with Motor |
| Compatible Model | DJI Air 2S Drone |
| Axis Type | Yaw Axis |
| Function | Gimbal Stabilization |
| Condition | New or Used (Tested) |
| Material | Lightweight Alloy |
| Color | Silver |
| Weight | Approx. 10g |
| Installation Required | Yes |
| Suitable For | Gimbal Repair/Replacement |
| OEM Part | Yes |
| Warranty | Not Applicable (Varies by Seller) |
| Availability | Varies by Seller |
| Price Range | ₹4,000 – ₹10,000 |
| Country of Origin | China |
| Package Includes | 1 x Yaw Arm with Motor |
| Compatible Camera System | DJI Air 2S Gimbal Unit |
Be the first to review “DJI Air 2S Yaw Arm Motor” Cancel reply
Overview
DJI Air 2S Yaw Arm Motor – The Hidden Power Behind Every Perfect Turn
Your DJI Air 2S may look like it’s gliding through the sky with cinematic grace, but behind every smooth pan and stable rotation is a hardworking hero—the yaw arm motor. This little component controls your drone’s side-to-side camera movement and is responsible for those dramatic cinematic turns that make your footage look straight out of a Bollywood aerial shot. If your camera’s turning feels stiff, shaky, or just plain off, chances are this motor needs a vacation—or a replacement. The DJI Air 2S Yaw Arm Motor is here to bring that smooth yaw movement back, quietly working behind the scenes to ensure every flight is film-ready.
Key Features Of DJI Air 2s Yaw Arm Motor
1. Perfectly Tailored for DJI Air 2S
No shortcuts here—this yaw motor isn’t recycled from another drone or picked out of a universal parts bin. It’s built specifically for the DJI Air 2S, designed to fit seamlessly into the yaw axis assembly of the gimbal. That means it matches the size, weight, connection ports, and performance profile of the original part, giving your drone a second chance to perform just like it did out of the box. You won’t need to juggle adapters or force-fit anything—it just works.
2. Restores Smooth Yaw Movement
Yaw axis giving weird wobbles mid-flight? Can’t get that sweeping left-right pan without jittering like a scared cat? This motor is the fix. By replacing the damaged or malfunctioning yaw motor, you’re restoring fluid rotational movement to your gimbal. That means no more jerky footage, no more software compensation, and no more post-edit headaches. Just clean, cinematic turns that follow your subject with buttery smoothness.
3. Silent but Strong Performer
Don’t be fooled by the size—this tiny motor works harder than your office AC during peak summer. It delivers consistent torque to rotate your gimbal while keeping noise and vibration levels so low, you’ll forget it’s even there. It handles constant directional changes mid-flight like a pro, without stalling, overheating, or throwing a tantrum. Whether you’re doing slow tracking shots or fast motion pans, this motor stays calm and reliable.
4. Lightweight Design, Heavy-Duty Output
The yaw arm motor is designed with lightweight coils and compact housing to maintain your drone’s overall balance and flight time. Despite its small frame, it packs enough power to smoothly control the gimbal without overloading the system or drawing too much battery. So you get pro-level stability without sacrificing airtime or responsiveness. It’s like having a gym-trained ballerina in your drone—strong, light, and graceful.
5. DIY-Friendly Installation
With the right tools and a little patience, even a first-timer can manage the installation. The motor comes with standard mounts and connectors, so there’s no guesswork. Just open the gimbal assembly, replace the motor in its original slot, connect the flex cables, and screw it all back. Calibration is key afterward, but once done, your gimbal is back to gliding like a dream. And if you’re nervous? Any decent repair tech can handle this with their eyes closed.
How to Use
-
Power off and disconnect the drone battery to avoid any accidental short circuits before beginning the motor replacement.
-
Carefully open the gimbal assembly using precision screwdrivers and anti-static tools. Identify the yaw axis component.
-
Unplug and remove the old motor by disconnecting the flex cable and unscrewing its mount from the yaw axis arm.
-
Install the new yaw arm motor by aligning it exactly as the old one was placed, securing it tightly, and reconnecting all cables correctly.
-
Perform gimbal calibration through the DJI Fly app to reconfigure your drone and ensure the new motor is fully synced and functional.
How to Clean
-
Use a soft, dry brush to gently dust off the exterior housing of the motor. Avoid pushing particles deeper into crevices.
-
For sticky spots, use a microfiber cloth dampened with 90% isopropyl alcohol. Wipe gently and avoid scrubbing hard.
-
Never use water-based cleaners as motors are sensitive to moisture, and internal corrosion can cause long-term damage.
-
Inspect the area around the motor regularly, especially after outdoor flights. Remove any sand or debris stuck in the axis joints.
-
Avoid using compressed air at high pressure, which may force debris into the motor windings or damage the connectors.
How to Take Care
-
Always store your drone in a padded case, especially when traveling. Sudden knocks can throw off the gimbal balance or misalign the yaw motor.
-
Avoid harsh takeoffs and landings, as shocks can weaken or loosen motor mounts, reducing performance over time.
-
Do not manually force the gimbal when powered off. Let the motors do the moving—they don’t like being dragged around.
-
Update firmware regularly, so the flight controller communicates properly with the new motor and ensures optimal response.
-
Perform routine inspections every 10–15 flights to ensure the yaw motor is operating smoothly and without physical resistance.
Dos & Don’ts
Do’s:
-
Use the correct tools when opening the gimbal assembly to avoid damaging screws or slipping on small parts.
-
Label connectors and screws during disassembly to make reassembly smoother and error-free.
-
Calibrate the gimbal immediately after motor replacement. This step is crucial for restoring full function and balance.
-
Use original or OEM-grade motors to avoid compatibility or power issues that could affect drone safety and performance.
-
Perform test flights in open areas after replacement to monitor the gimbal’s behavior and responsiveness.
Don’ts:
-
Don’t touch exposed flex cables with oily hands—this can damage connectors or lead to signal errors between the motor and controller.
-
Avoid using non-DJI parts that claim to be “universal”—they can cause more harm than good to your delicate gimbal system.
-
Don’t ignore small vibrations or delays in panning, as they may be early signs of motor strain or imbalance.
-
Never skip post-installation testing, even if the drone powers on fine. Gimbal calibration is what makes everything work properly.
-
Don’t fly immediately in windy conditions after replacement. Do a few calm test runs to ensure everything is steady and balanced.
Safety Tips
-
Wear an anti-static wristband while handling internal gimbal parts to protect sensitive electronics from discharge damage.
-
Keep small screws organized and avoid using magnetic tools near the gimbal motors as they can interfere with sensor readings.
-
Power down the drone completely before touching any internal parts. A live gimbal can rotate suddenly and cause injury.
-
Always test manually first by rotating the gimbal gently before powering on, to check for friction or misalignment.
-
Get professional help if unsure, especially if the gimbal was already damaged. Don’t risk worsening the issue with a wrong repair.
Final Words
The DJI Air 2S Yaw Arm Motor might look small, but it’s the muscle behind your drone’s smooth panning and perfect camera control. If your drone has been struggling to make clean turns or feels like it’s resisting movement, this is your solution. With OEM-grade quality, lightweight design, and easy installation, it’s the best way to bring your gimbal performance back to life. Don’t settle for jittery footage or faulty motors—upgrade to the genuine yaw arm motor and fly with confidence, stability, and cinematic grace.


Reviews
There are no reviews yet.